Dilations 2

Topic:
Dilation
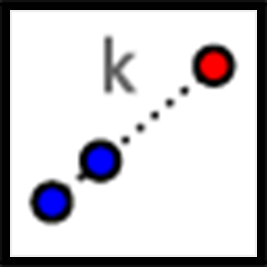
Students apply a dilation to points on a ray. The scaffold of the circular grid has been removed but the structure of dilations is the same. Without the grid, students will need to come up with a way to measure in order to find the point twice as far from A as B and half as far from A as B. They can use a ruler or the edge of an index card.Monitor for these methods:
  • using a ruler to measure distances
  • marking off distances on an index card (for problem 1)
  • folding paper in half (for problem 2)
This activity investigates dilations with no grid. Students have seen these for the first time in the warm-up, which had a ray drawn between two points. That scaffold has been removed here so the teacher may need to provide guidance by suggesting that students draw appropriate rays. Encourage students to measure distances carefully at first, since the problem statement does not state that the image of each point, after the dilation indicated, is one of the labeled points. After doing a few of the problems, the students should notice that the dilated point is always one of the labeled points and then use this observation to expedite the work. Also monitor for students who see the relationship between the scale factors used to send G to E and E to G (both with center H). Launch Ask students to work on the first question and then pause. Demonstrate, or have a student demonstrate, drawing a ray from point A through point B (the ray goes through points H and I). Show that the length of AI is five times as long as the length of AB, either with a ruler or by marking intervals on the edge of a blank piece of paper. Or, if using the digital activity, use the measuring tool.(Click two points to measure the distance between them.) If using the digital activity, it may be easiest for students to work with a partner, with one device used to manipulate the applet and the other device used to display the questions. n this activity, students continue to apply dilations without a grid. Unlike in the previous activity, the dilated images of the points are not plotted. So rather than identifying the correct point, they will need to find an appropriate way to take measurements (MP5), most likely with the aid of a ruler or the edge of an index card. Different students will work with different scale factors and will produce perspective drawings of a box. Watch for students who pick a point close to one vertex of the given rectangle. If the point is too close, it will be more difficult to visualize the box. Suggest that they move the point further away. Monitor for students who produce accurate drawings with different scale factors and invite them to share during the discussion. Launch Provide access to geometry toolkits. First, a demonstration about dilating a point on a plane with no grid. We want to dilate point B using A as the center of dilation and a scale factor of 3. Use a straightedge to draw ray AB. Measure the distance from B to A. Multiply the distance by 3. Draw B′ so that it is 3 times as far away from A. For scale factors that are integers, an unmarked edge of an index card or a compass can also be used to transfer the distance along the ray. If we wanted a scale factor that is not an integer the procedure is the same. Measure the distance from A to B, multiply by the scale factor, and place B′ at that new distance from A. Let’s say the distance from A to B is 4.8 cm. If we wanted to use a scale factor of 2.5, the distance from A to the dilated point B′ would be 12 cm, because (4.8)⋅(2.5)=12. A perspective drawing is an optical illusion that makes an image printed on paper have a three-dimensional look. Display at least one example of a perspective drawing:
ollow the directions to perform the dilations in the applet.
  1. Dilate P using C as the center and a scale factor of 4.
    1. Select the Dilate From Point tool. 
    2. Click on the object to dilate, and then click on the center of dilation.
    3. When the dialog box opens, enter the scale factor. Fractions can be written with plain text, ex. 1/2.
    4. Click  
    5. Use the Ray tool and the Distance tool to verify.
  1. Dilate Q using C as the center and a scale factor of 12.
  1. Draw a simple polygon. Choose a point not on the polygon to use as the center of dilation. Label it.
    1. Using your center point and a scale factor your teacher gives you, draw the image under the dilation of each vertex of the polygon, one at a time. Connect the dilated vertices to create the dilated polygon.
    2. Draw segments that connect each of the original vertices with its image. This will make your diagram look like a cool three-dimensional drawing of a box! If there's time, you can shade the sides of the box to make it look more realistic.
    3. Compare your drawing to other people’s drawings. What is the same and what is different? How do the choices you made affect the final drawing? Was your dilated polygon closer to your center point than to the original, or farther away? How is that determined?