Ray Tracing with Curved Mirrors
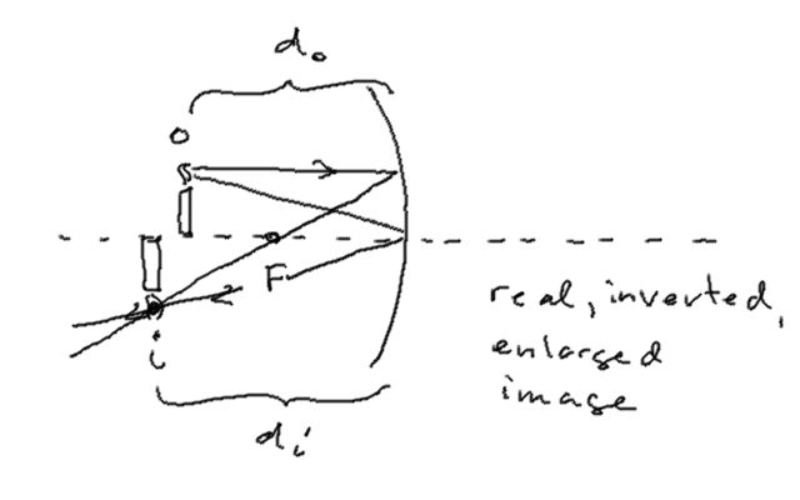
When dealing with curved mirrors, there are three useful rays to track to find the resulting image location:
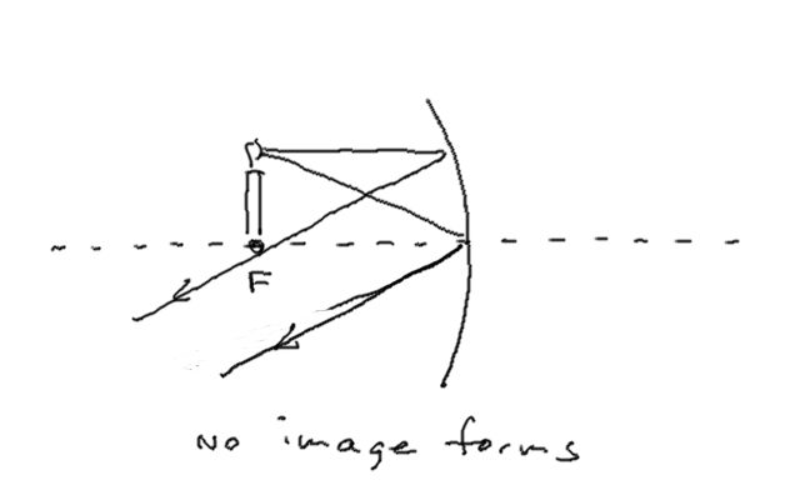
- A ray coming in parallel to the principal axis.
- A ray heading right for the center of the mirror where the surface is vertical like a plane mirror.
- A ray leaving the light source, passing through F, and reflecting parallel to the principal axis.

Sign Conventions
If we wish to label or measure the distances where the object sits and where the image forms, the rules are simple, and depend of what the light is doing.
- First off, the object location is automatically considered positive and is typically drawn on the left side of the mirror or lens (like we read left to right).
- The image distance is positive if it's a real image (made of real light) and negative if it's a virtual image.
- Likewise, if the focal point is at a location where real light can go, the focal length is positive. It is negative if it's behind the mirror where light will never be.
Image Location using Algebra
The reason we care to place signs on these distances is that we need not always find images using diagrams. As you might suspect, there is an algebraic equivalent to these geometric drawings.
There is an equation that goes by two names - the mirror equation and the thin lens equation - that relates the three quantities of object distance, image distance and focal length. Be sure to follow the sign conventions above. The equation is:
Another useful equation is the magnification equation: This equation tells us how big the image is in relation to the object. When the magnitude of the magnification is greater than one, the image is larger than the object, and when it's smaller than one, the image is smaller. The sign of the magnification tells us whether the image is upright or inverted. Positive means an upright imagine, negative means an inverted image.