Creating more puzzles for AR and 3D printing
To create your own puzzle, the first thing you need is an idea.
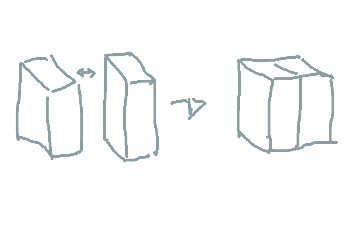
Investigate which parts a cube consists of.
Find out which geometries you can see in combination.
Turn a cube upside down, inside out.
Making drawings can help alot to find your special and personal way how to create a cube puzzle - or any puzzle for that matter.
We will aim for a super simple puzzle - a cube made out of two rectangle based cuboids.
Make a prototype
It can help also to make a prototype of your puzzle out of paper.
This is especially helpful if you want to get a feeling for all the geometrical shapes your puzzle could consist of. Maybe you find an even better solution in the process!
Open GeoGebra, start working!
After you kow exactly how your puzzle should look like, create an applet using GeoGebra to realise it.
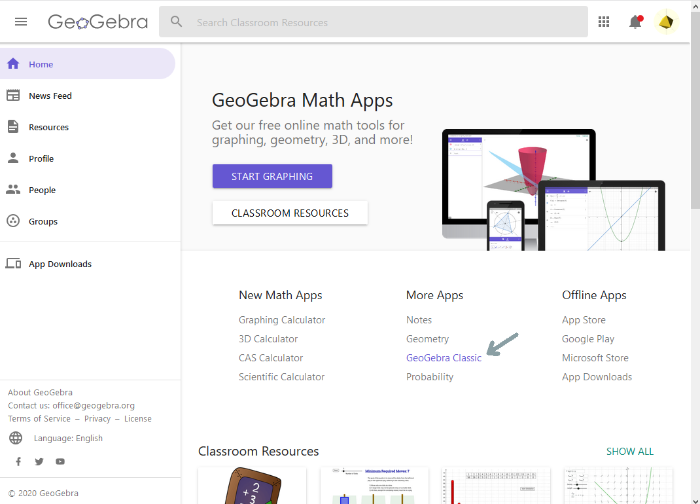
First, go to your resources and create a new one. You find this possibility if you go to the Geogebra website and choose GeoGebra classic.
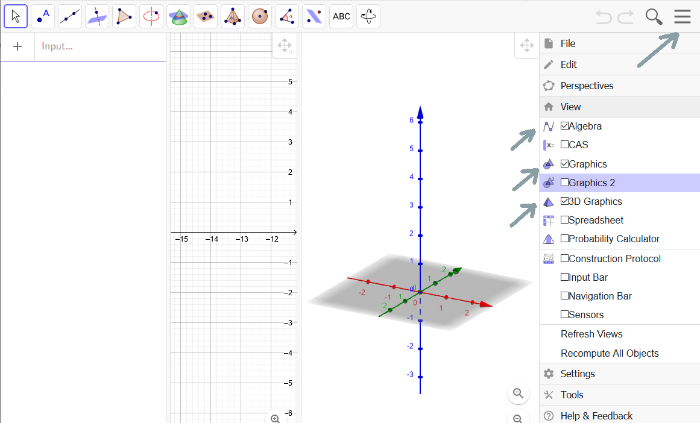
Adjust your working space
After opening the classic GeoGebra version, you might want to make sure you adjust it to your personal needs.
Usually, three things help:
- The Algebra view
- The Graphics view
- The 3D Graphics view
Create shapes
GeoGebra is able to make polygones into 3 dimensional objects.
Our example consists of simple shapes. If you have more experience with GeoGebra, you will be able to create much more complex shapes.
To make it easier for us, we first set the points to be fixed to the grid and then select the points tool.
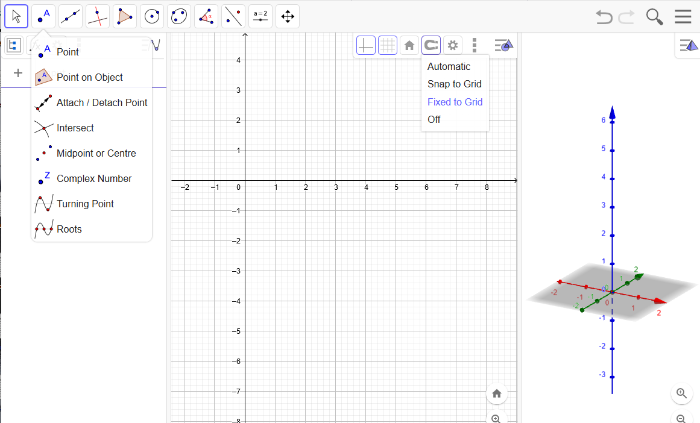
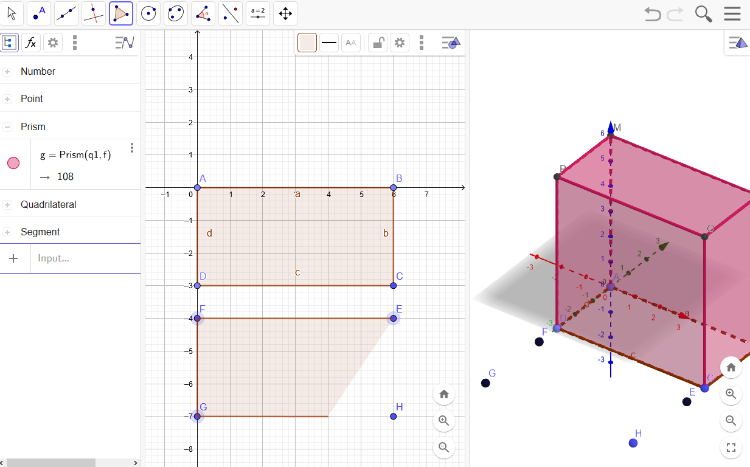
Make geometrical shapes
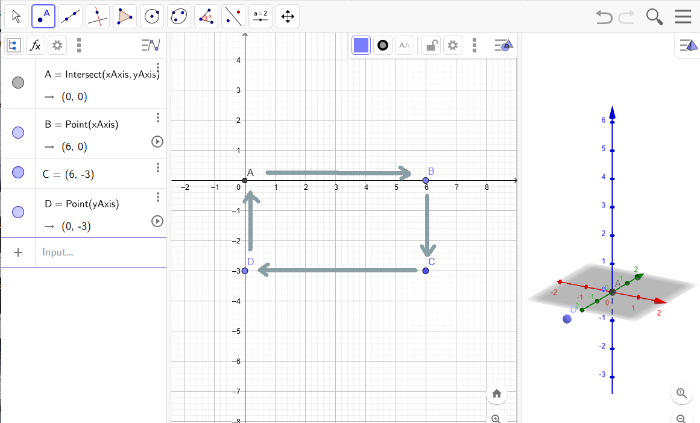
Next, create your geometrical shapes. Add dots in a shape describing your objcets base.
If you chose the option of having the points on the grid, on the left side you see that we avoided commas by that, the coordinates of the points will be wholenumbered.
Polygone creation!
Now, you can select the polygone tool - the thing shaped like a triangle - on the upper left menu.
Click on all the previously created dots. Again, in a row, and end where you started.
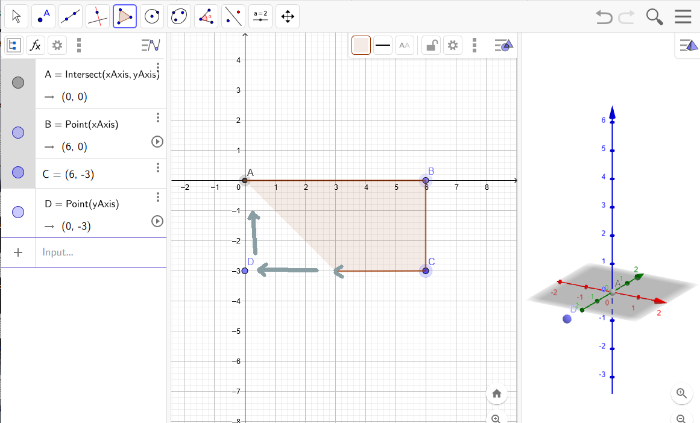
This will give you a bunch of new stuff in the algebraic view on the left.
Also, a polygone will appear in your 3D view.
Select the polygone in the 3D view!
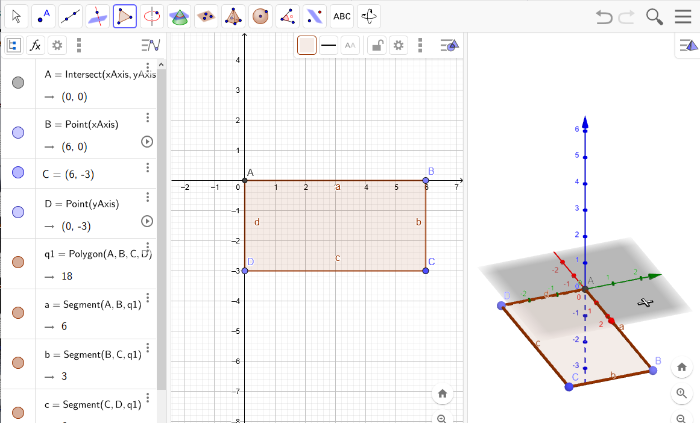
Extrude!
Now, make your polygone a 3D object by a so called extrusion.
To do that, go to the pyramid symbol a little further left and choose Extrude to Prism.
You will get the shape you created, just with an additional dimension: it gets tall!
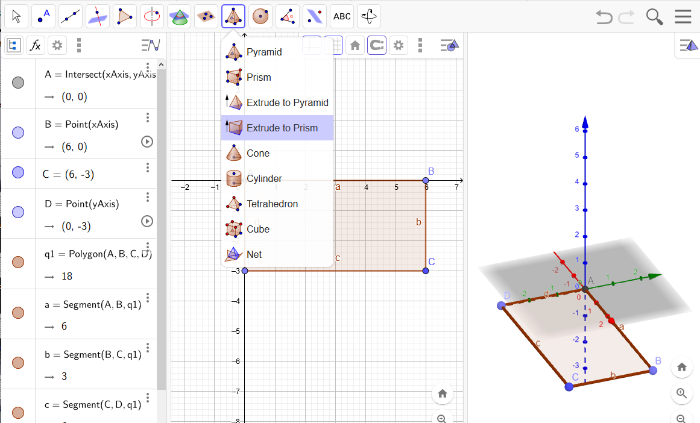
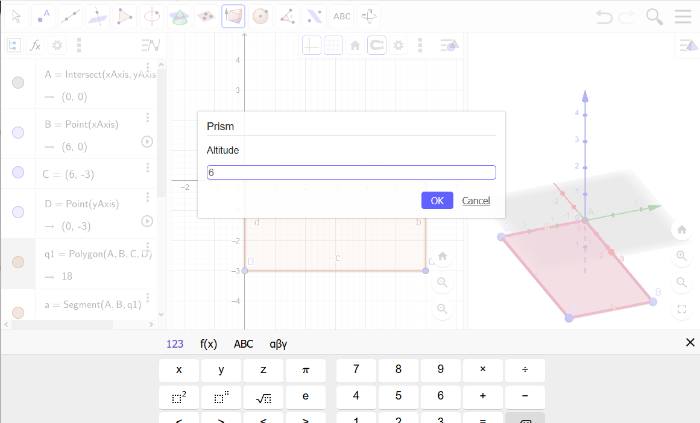
Click onto your prism in the 3D Geometry view. A popup will ask you how high it should get extrudet!
If the popup does not pop up, click the extrude icon and then again click on the prism in the 3D view.
That should make it pop up.
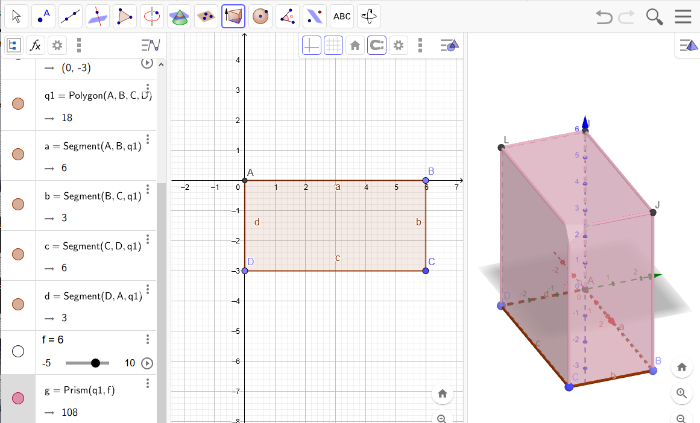
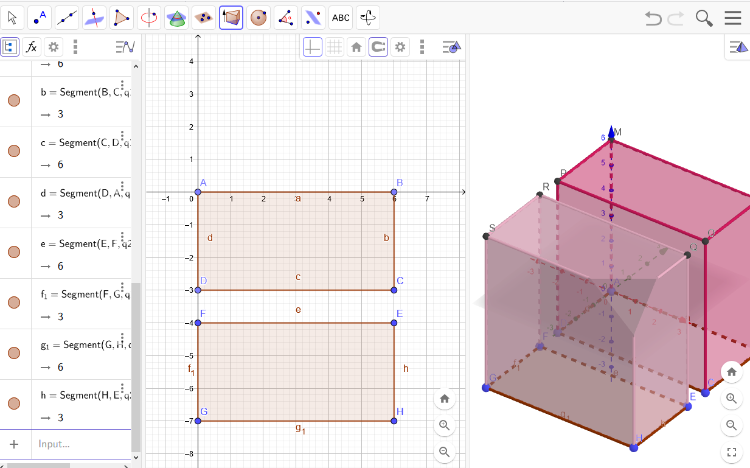
Repeat for all the other parts of your puzzle!
Now repeat this for all the other parts your puzzle should have.
Our puzzle is quite simple and only contains 2 parts. So we are done soon!
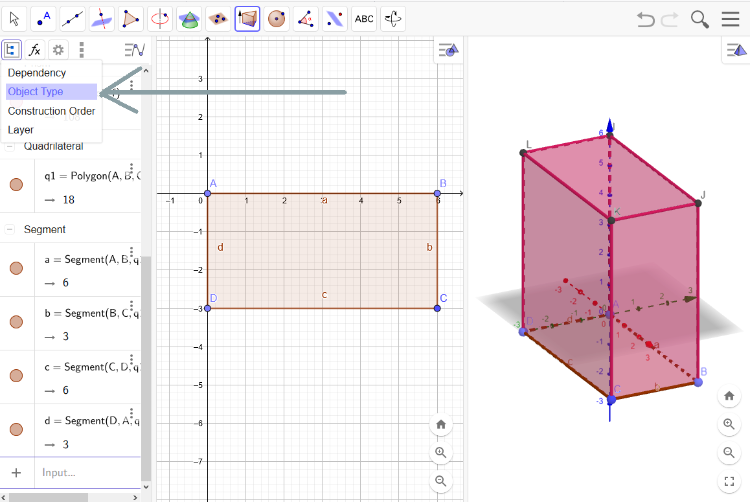
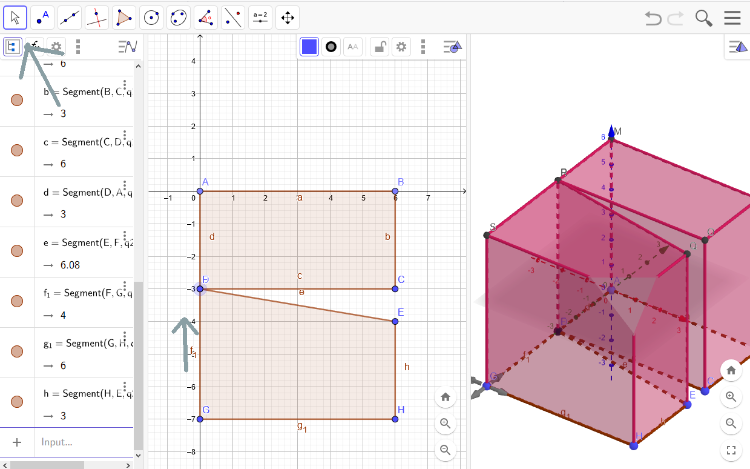
Just for convenience - if you feel like it - you can reorder all objects according to the Object Type instead of the Construction Order.
For me it is easier to find the polygones if it is sorted by Object Type.
Create more dots, connect them by the polygone tool again.
Extrude!
Now, you could go to the upper right part where you chose your views and download the objects as STL.
You should let them be repaired if necessary using eg. the automated repairtool of Repetierhost and you can then slice it and print it.
Create a nice applet while you are at it!
Since we already have GeoGebra open we can use it to create an applet showing how the parts can be assembled. This can help to understand how the puzzle works and how the virtual and physical parts work together.
Basically, this means we need to create a cube out of the parts and make them movable.
Make an entire cube out of the parts
You can select the arrow symbol to move the base points so your parts form a cube.
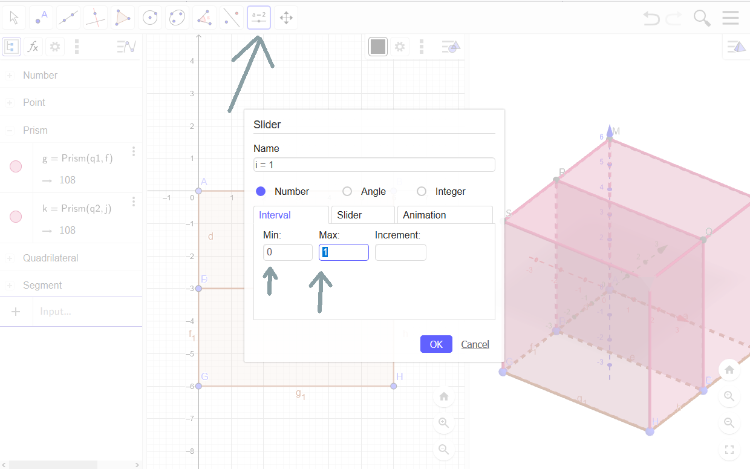
Sliiiiiiiide!
A slider will help to move the parts away from each other.
On the top you find the slider icon which you can add to your applet.
You might want to change the start and end though to 0 and 1.
I like to move it move it!
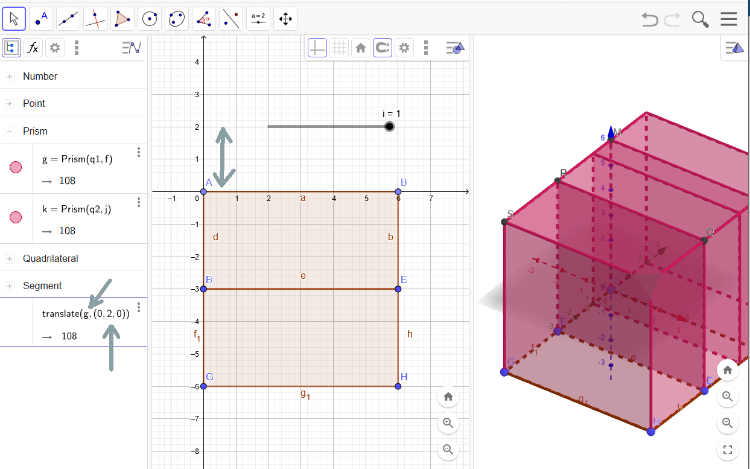
We use the command translate to move one of the cubes along an axis.
translate(NameofthePolygon,(xAxis,yAxisz,Axis))
Our extrudet parts are called g and k
We want to move our cube along the Y Axis so we need to choose to move it 0,2,0
So we will use the command translate(g,(0,2,0))
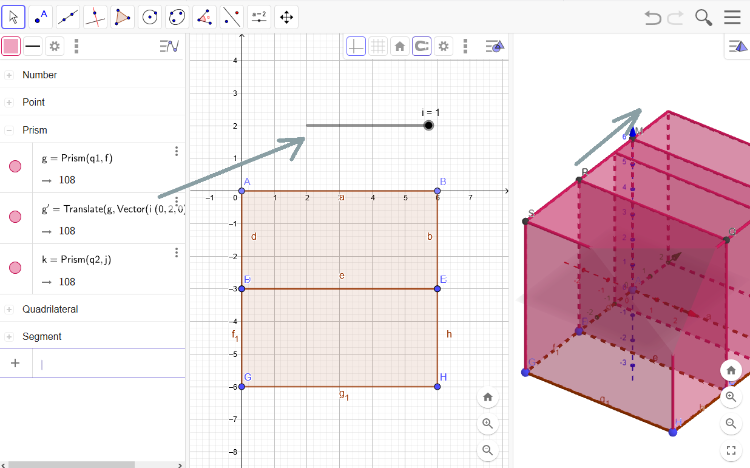
Connect the slider with the translation!
Now, all we need to do is to connect the slider and the movement of the puzzle part.
We do that by multiplying the movement by the slider.
Now we see, that it makes sense to have the slider move from 0 to 1 instead of -5 to 5.
Our sliders name is "i" so we have to adapt our translate command:
translate(g,(i(0,2,0)))
We are done!
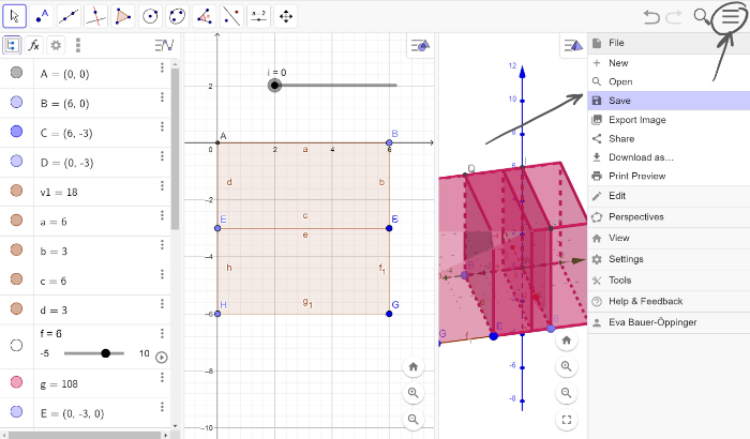
You better not forget to save your applet.
If you do, you will be able to show your puzzle around virtually and physically!